Making Wild Yeast Starters
Looking at culture, foraging for and making wild yeast starters for fermented sodas and brews
Hello, Hello,
I am not sure where to start. You may or may not remember that I left the US on May 26, and have been in Europe, fermenting, since. The time has been so busy and concentrated that this is the first time I have opened my computer to sit down and write. I have to say I am feeling a bit untethered from all that is my normal. While I have been working in many ways more hours than ever it is very different to be engaging in real time with humans in beautiful cities than from my mountain home via a keyboard and screen.
And yet…in a way this feels very familiar like something from my childhood. Transitory. Drifting, or at least bobbing along on a current that was not in my control. And, making new friends, then moving on to the next place. Of course, the difference is, the stream I’ve been navigating my little raft on these past few weeks has been in my control (as much as life can be) as I chose to do this Symbiosis Tour of fermentation.
As we moved from one venue to the next, I was frequently asked, “where did you grow up?” The answer was then a long, or abbreviated, recitation of a list of all the places on the globe that my family called home at one point or another in my childhood. At times we lived in various places in the country of my and my mother’s birth. At times we lived in Munich, Germany the country of my father’s birth and home to my grandmother and extended family. There was also the year when I was a small girl, losing her baby teeth, that we lived in the village of Ari, on the island of Ambon, in the Moluccas. The constant was that in all of these places I was different.
In many of the events that Mara King and I did the underlying theme became not just the microbial culture that we collaborate with as we ferment but also the human culture. This conversation at the Ulster Folk Museum outside of Belfast was about identity and traditional arts and how fermentation helps us find a sense of place and connection to place and nature. Later in the week, culture became a conversation about third-culture kids, and how those of us that grew up between cultures often feel other, or lonely, and how as a result interact with the places we are living in at any moment. Many of us could relate to missing a sense of belonging, in one conversation someone shared that she is most comfortable in airports where so many people are coming and going. I remembered that at the age of 19, my career goal was to work as an airport manager, for that very reason. It was a place I felt I knew how to navigate. I do believe that a super-power from a childhood of an unclear feeling of belonging is an ability to recognize and appreciate many perspectives.
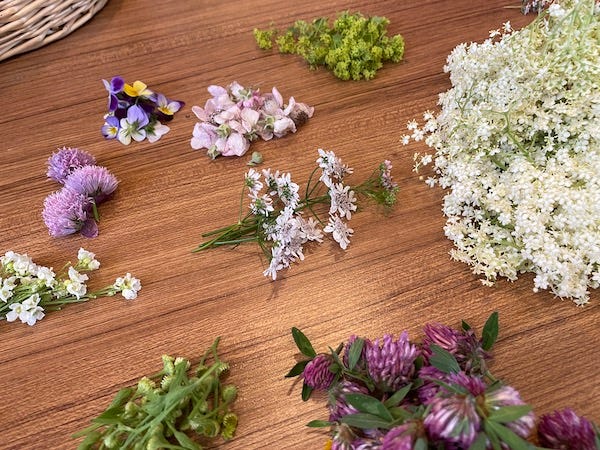
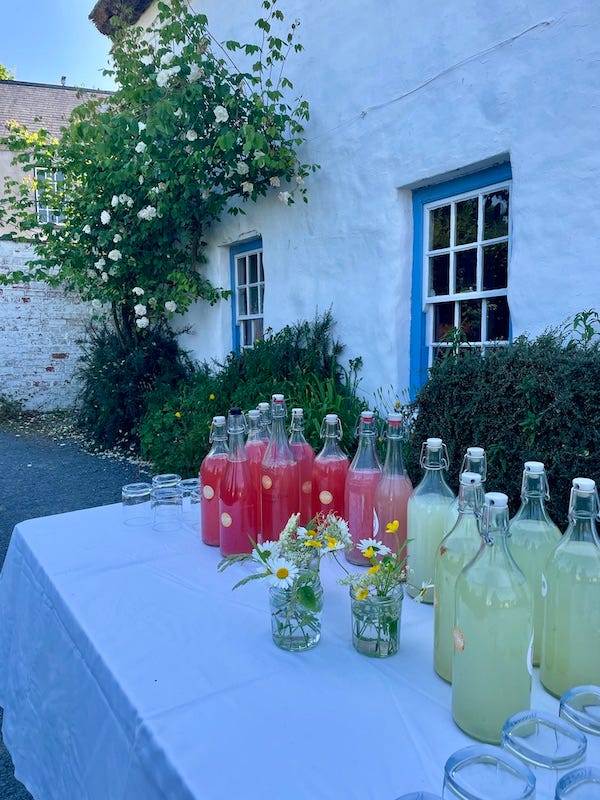
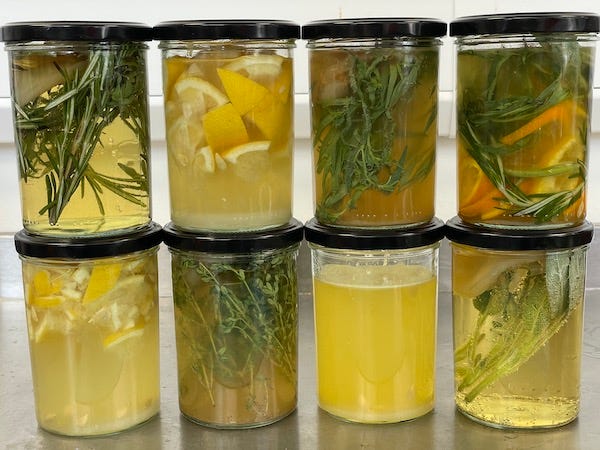
In many ways, we as humans have disconnected ourselves with nature through the ages, in this way most of us are living with a sense of otherness. Exploring fermentation can be a way to reconnect with the truth, that we are part of nature, and microbes are also us. With the theme of place and connection with the microbes and nature, we made wild yeast starters, in Somerset (along hedgerows), Belfast (at an open-air museum), and London (in a city park). These starters, often made from edible blooms and blossoms, can be used to start fermented sodas, boozy beverages, or vinegars. In Edinburgh, my first stop, we used wild yeasts from lemons and herbs to bring yeast to the vinegar party. The beauty is that it is a tangible way to see the microbes that are all around us—no matter how detached our residence may seem from nature.
Foraging for wild yeast
Yeasts eat sugar, so it stands to reason they are found most readily on blossoms and the fruiting bodies of the plant. Sometimes we might see this as the white powdery bloom that you see on many fruits like grapes, blueberries, plums, and even prickly pear or juniper berries, but it is on and throughout all fruit.
As foraging or wildcrafting has become more popular, the concern is whether it is sustainable. Harvest wild edibles with care. I rather love that harvesting in this way doesn’t compromise plant populations.
When you are foraging for yeast, you don’t need to harvest a huge quantity (take less than half of any one given plant, and less if there is a small population) and the plants don’t need to be “wild” for the yeast to be. Much of what we pick are domesticated plants — for example the petals of sunflowers in our garden or blossoms from our fruit trees. Here are a few important things to keep in mind while foraging:
Avoid plants growing by roadsides, as they will have collected exhaust and may bring harmful chemicals into the mix. By the same token, don’t harvest from plants, trees, or blossoms that have been sprayed with pesticides or herbicides. In short, spend some time observing the areas you are interested in and make sure the plants aren’t contaminated.
Do your research. Know what plants are rare and shouldn’t be harvested at all. Don’t harvest from protected and preserve areas.
Not every flower (or plant) is edible. Again, do your research and be sure that you identify the plant and flower and only use the edible parts.
Use flowers and botanicals sparingly — at first, especially — as some may cause digestive upset in some people.
Making a wild yeast starter
A huge advantage to making a starter is that you make a small amount, so if it is not performing as you would like you don’t have to use it for anything else. You can learn a lot by observing and tasting small batches that you make in pint jars. Another advantage is that you can propagate it when the ingredients are fresh, keep feeding it, and use it whenever you want — not just in a particular season. Lastly, you can isolate the strains you love to repeat — and that is the first step in a wild yeast becoming domesticated by you.
Yeasts eat sugar, so to propagate the yeasts, you will put them in a sugary environment, where their population will increase to a point where you can pitch them into your cider. I use pasteurized apple juice because, unlike plain sugar water, it contains nutrients that the yeasts need to thrive. I find pasteurized apple juice is the best medium, it has enough nutrient and once fermented is neutral enough in flavor to add to any project that I have going.
Steps to make a wild yeast starter jar
1. Sterilize a clean 1-pint jar and its lid (or another container with a tight-fitting lid or one that can hold an airlock) by submerging in boiling water for 10 minutes.
2. Using tongs, transfer the hot jar to a heat-proof surface or clean towel, placing it right side up.
3. Fill the jar three-quarters full with apple juice. For a pint jar, this will be 1 ½ cups (355 ml) pastuerized apple juice.
4. When the juice in the jar cools to room temperatures, add fresh botanicals, berries, or flower petals. We use about 1/3 cup (71 g) fruit for 1 ½ cups (355 ml) juice. For flower petals and dried or wispy botanicals (like usnea), we’ve found that 5 to 20 grams is often sufficient. As little as 1 to 2 grams will work, but if you want a stronger flavor use more.
5. Cover the jar with a piece of clean, tightly woven cloth and secure with a rubber band or, even better, cover with a lid or an airlock. The carbon dioxide will need to escape so if you use a lid, it will need to be burped once or twice a day.
6. Let it sit in an environment that is at room temperature. Stir or shake the mixture (if you are using a tight lid) about 3 times a day. In about 2 to 3 days (longer in cool weather), you will start to notice bubbling. As the yeast populations grow, the bubbling will become more active, and you will be able to smell and even taste the solution to see what kind of flavors are developing. If you don’t see any activity after the first week or so, or if you begin to see mold growth or a layer of surface yeast growing on top the wild yeast did not take. Toss the starter and begin again. Surface yeast will show as a white film dusting the top of the liquid, whereas the fermenting yeasts will generate a lot of activity and then a sediment layer will develop on the bottom of the jar. (You might have both together in the same jar, but surface yeast is a contaminant, and you must throw the starter away.)
7. When the starter is very active, strain the liquid and use the entire strained amount to start your project. At this point your starter is ready. Use it all immediately or if you want to keep the starter going to use in future recipes, use only 1 cup (237 ml) of the strained starter liquid to start your cider. Add 1 cup of juice to the remaining starter in the jar to feed the yeast population. If you aren’t quite ready to pitch into a project. Put it in the fridge where it will wait for you indefinitely.
The next paid subscriber post will share what do to once you have a starter made.
Thanks for reading,
Kirsten


I have been eyeing the my passion vine flowers as they start to bloom, wondering about trying this & the blooms and/ or the limes on my Kaffir Lime tree